Notice: Function _load_textdomain_just_in_time was called incorrectly. Translation loading for the acf domain was triggered too early. This is usually an indicator for some code in the plugin or theme running too early. Translations should be loaded at the init action or later. Please see Debugging in WordPress for more information. (This message was added in version 6.7.0.) in /www/wwwroot/leadcont.com/blog/wp-includes/functions.php on line 6170 How to Change a Circuit Breaker from 15 to 20 Amp
How to Change a Circuit Breaker? Upgrading a circuit breaker from 15 amps to 20 amps can significantly enhance your home’s electrical capacity, allowing for the safe use of more devices. This comprehensive guide will walk you through the entire process, ensuring you have all the information needed to perform the upgrade safely and effectively.
Circuit Breakers: Why Upgrade?
The Role of Circuit Breakers in Electrical Safety
How to change a circuit breaker? Circuit breakers are crucial components of your home’s electrical system. They serve as protective devices that automatically interrupt the flow of electricity when an overload or short circuit occurs. This action prevents overheating, potential fires, and damage to electrical appliances. Essentially, they act as a safety net, allowing you to use your electrical system with greater confidence.
15-Amp vs. 20-Amp Breakers: What’s the Difference?
A 15-amp breaker is typically used for lighting circuits and general outlets. This rating is often sufficient for small appliances and everyday use. However, as homes become more reliant on power-hungry devices—such as microwaves, space heaters, and multiple electronics—a 20-amp breaker may become necessary.
A 20-amp breaker can accommodate larger loads, which is particularly beneficial in areas where multiple devices are used simultaneously. For instance, if you frequently use high-draw appliances like toasters or hair dryers, a 20-amp circuit can reduce the likelihood of tripping the breaker.
Benefits of Upgrading to a 20-Amp Breaker | How to Change a Circuit Breaker
Increased Capacity: A 20-amp breaker can handle larger electrical loads, making it ideal for circuits that support multiple outlets or heavy appliances.
Fewer Tripped Breakers: With higher amperage, you’ll experience fewer interruptions when using multiple devices at once, enhancing your daily convenience.
Enhanced Device Performance: Devices that require more power can operate efficiently without the risk of tripping the breaker, providing a better overall user experience.
Preparing for the Upgrade: Tools and Safety Precautions
Essential Tools for the Job
Before you start, make sure you have the following tools:
Screwdrivers: Both flathead and Phillips screwdrivers will be necessary for removing the panel cover and securing the breaker.
Wire Strippers: Used for stripping insulation off wires to ensure secure connections.
Insulated Gloves: These protect against electrical shock when handling wires and components.
Voltage Tester: Essential for ensuring that power is off before you start working on the circuit.
New 20-Amp Circuit Breaker: Ensure compatibility with your breaker panel. Consult your panel’s specifications or an electrician if unsure.
Electrical Tape: For securing wire connections and providing extra insulation.
Safety First: Working with Electricity Safely
Safety is crucial when dealing with electrical systems. Follow these key precautions:
Turn Off the Main Power: Always begin by turning off the main breaker to disconnect power to the entire panel. This is typically located at the top of the breaker box.
Confirm Power is Off: Use a voltage tester to verify that the circuit you’re working on is not live. Test at the breaker terminals and any outlets on that circuit.
Wear Insulated Gloves: These provide an additional layer of protection against accidental contact with live wires.
Maintain a Clear Workspace: Remove any clutter and ensure you have adequate lighting. This helps prevent accidents and allows you to focus on the task at hand.
Step-by-Step Guide to Changing Your Circuit Breaker
Disconnecting Power and Removing the Old Breaker
Turn Off the Main Power: Locate your main circuit breaker and switch it off. This ensures all power is cut to the panel, allowing you to work safely.
Open the Panel Cover: Use a screwdriver to remove the screws securing the panel cover. Carefully lift the cover off and set it aside, exposing the circuit breakers inside.
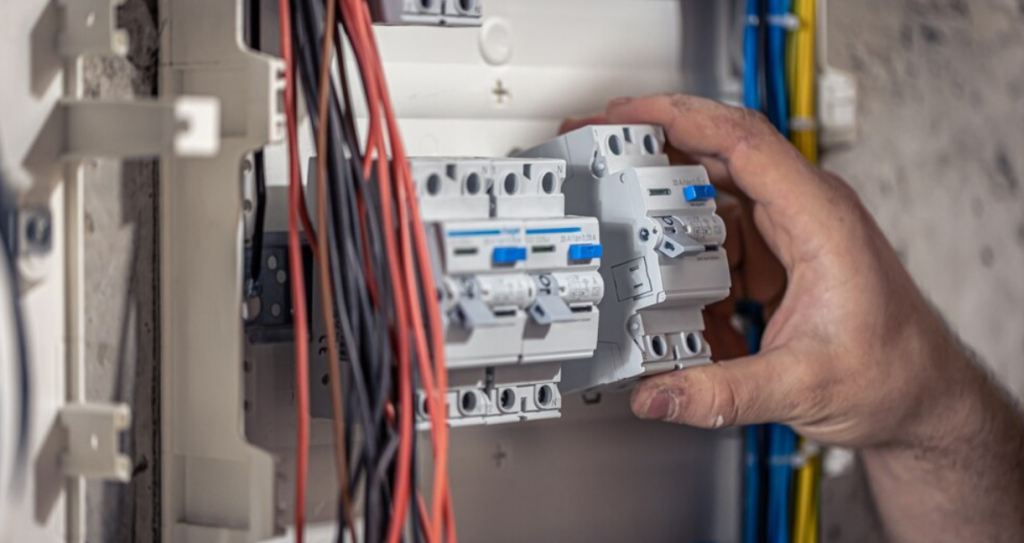
Remove the Old Breaker: Identify the 15-amp breaker you wish to replace. It’s typically a single-pole breaker that occupies one slot in the panel. Unscrew the mounting screw holding it in place, then gently pull the breaker out from the panel. It’s helpful to take a picture or write down how the wires are connected for reference.
Installing the New 20-Amp Breaker
Prepare the Wires: If the wire ends are frayed or damaged, use wire strippers to remove about 3/4 inch of insulation from the ends. Make sure the copper wire is clean and shiny.
Connect the Wires to the New Breaker: Attach the wires to the new 20-amp breaker. Typically, you’ll connect the hot (black or red) wire to the brass terminal and the neutral (white) wire to the silver terminal. If there’s a ground wire (bare or green), it should connect to the green grounding screw on the breaker.
Insert the New Breaker: Carefully slide the new breaker into the slot where the old one was. Ensure it snaps securely into place.
Secure the Connections: Tighten the screws on the terminals to secure the wire connections. Ensure they are snug but avoid overtightening, which can damage the wire or terminal.
Replace the Panel Cover: Once the new breaker is securely installed, carefully put the panel cover back on and screw it in place.
Testing the New Breaker
Turn On the Main Power: Switch the main breaker back on to restore power to the panel.
Turn On the New 20-Amp Circuit Breaker: Flip the new breaker switch to the “ON” position. You should hear a click, indicating that it is functioning correctly.
Test the Circuit: Use a voltage tester on the circuit to confirm it is live. Alternatively, plug in a small device or lamp to check that it operates properly.
Monitor for Issues: For the first few days, keep an eye on the circuit. If the breaker trips or you notice any unusual behavior, it may indicate an underlying issue that needs addressing.
How to Change a Circuit Breaker Final Thought
Upgrading a circuit breaker from 15 to 20 amps can significantly improve your home’s electrical capacity and safety. This upgrade allows for greater flexibility in using electrical devices and reduces the risk of tripped breakers during peak usage times. By following this detailed guide and prioritizing safety, you can confidently perform this upgrade on your own.
If you have any doubts during the process or encounter unexpected issues, it’s always best to consult a licensed electrician. At LeadCont, we provide expert guidance and ensure your electrical system is safe and compliant with local codes.
For a free quote on your electrical needs, register with LeadCont today!
Additional Considerations | How to change a circuit breaker?
Check Local Codes: Before making any changes, familiarize yourself with local electrical codes and regulations. Some jurisdictions may require permits for electrical work or mandate specific requirements for breaker upgrades.
Evaluate Your Electrical System: If you find yourself frequently upgrading circuit breakers due to high demand, it may be time to evaluate your overall electrical system. An electrician can help assess whether your home needs a complete panel upgrade or additional circuits.
Wiring Considerations: Ensure that the wiring connected to the 15-amp breaker is adequate for a 20-amp circuit. Generally, a 12-gauge wire is necessary for 20 amps. If your current wiring is only rated for 14-gauge, it is unsafe to upgrade the breaker without upgrading the wiring.
Future Needs: Consider your home’s future electrical needs. As technology evolves, homes are increasingly equipped with high-powered devices. Planning for this by upgrading your electrical system can save you headaches down the line.
By being proactive and informed about your home’s electrical needs, you can ensure a safe and efficient electrical system for years to come.