acf domain was triggered too early. This is usually an indicator for some code in the plugin or theme running too early. Translations should be loaded at the init action or later. Please see Debugging in WordPress for more information. (This message was added in version 6.7.0.) in /www/wwwroot/leadcont.com/blog/wp-includes/functions.php on line 613117950 NW 53rd Street Suite 337
Miami, Florida 33166


Is your shower floor starting to look dirty or grimy? You’re not alone. Over time, soap scum, grime, and even mold can build up on your shower floor, making it look unappealing and unhygienic. The good news is that cleaning your shower floor doesn’t have to be a difficult task.
While the most common issue is soap scum accumulation, environmental factors like moisture and humidity can also lead to mold growth. Understanding how to properly clean your shower floor is key to maintaining a safe and sparkling bathroom. In this expert guide, we’ll show you simple and effective ways to clean the floor of your shower, no matter what type of surface you have.
We’ll also provide tips on regular maintenance to keep your shower clean with minimal effort. Let’s get your shower floor back to its sparkling best while ensuring it stays hygienic for the long term!
Cleaning the floor of your shower regularly is more important than simply keeping your bathroom looking nice. A dirty shower floor can harbor mold, mildew, bacteria, and other harmful microorganisms. These can lead to various health problems, such as respiratory issues, skin irritation, or even infections. Mold, in particular, is a significant concern, as it thrives in moist, humid environments like showers. Mold spores can easily spread and affect the air quality in your home, especially if left unchecked for a long time.
In addition to health risks, a dirty shower floor can also become damaged over time. Soap scum, grime, and mildew can wear down the surface, causing stains, discoloration, or even cracks in the grout. By cleaning your shower floor regularly, you can extend the lifespan of your shower and prevent costly repairs or replacements.
Moreover, cleaning your shower floor helps you maintain a pleasant and inviting bathroom environment. A clean, fresh-smelling shower floor makes your bathroom more enjoyable to use and can create a sense of calm and relaxation. Keeping your shower floor clean also reduces the buildup of soap scum and hard water stains, ensuring your bathroom remains pristine.
Cleaning the floor of your shower may seem like a daunting task, but with the right approach, it can be done efficiently and effectively. Here’s a detailed, step-by-step guide to help you get the job done:
Before you start cleaning, it’s important to gather all the necessary supplies. Having everything ready will save you time and effort and ensure a smooth cleaning process. Here’s a list of the tools and products you’ll need:
Broom and dustpan: To sweep away dirt, hair, and other debris.
Scrub brush: To scrub the floor and grout lines. Choose a brush with stiff bristles for effective scrubbing.
Mop: For rinsing and wiping the floor.
Bucket: For mixing your cleaning solution.
Rubber gloves: To protect your hands from harsh chemicals.
Cleaning products: The type of cleaner you use will depend on the type of shower floor you have (more on that later).
Squeegee: To remove excess water and prevent water spots.
Towels: To dry the floor after cleaning.
The first step in cleaning your shower floor is to sweep it thoroughly to remove any loose dirt, hair, or debris. This is important because sweeping helps prevent dirt from mixing with the cleaner and turning into a muddy mess. Sweep the entire floor, including the corners and around the edges of the shower, where dirt tends to accumulate. Once the floor is clear of debris, you’re ready to move on to the next step.
Now that the floor is free from debris, it’s time to choose the right cleaning solution. The type of cleaner you use will depend on the material of your shower floor. Here’s a breakdown of the best cleaning solutions for various floor types:
Tile Floors: Tile floors are the most common type of shower floor. To clean tile floors, a mixture of white vinegar and baking soda works wonders. The vinegar helps dissolve soap scum and mineral deposits, while the baking soda acts as a mild abrasive to scrub away grime. Alternatively, you can use a commercial tile cleaner or a multi-surface cleaner.
Stone Floors: Stone floors, such as marble or granite, require a pH-balanced cleaner to avoid damaging the surface. Avoid acidic cleaners like vinegar, as they can cause etching or discoloration on stone. A gentle, stone-safe cleaner will do the job without causing harm to the surface.
Acrylic Floors: Acrylic floors are delicate and require a gentler approach. Use a mild all-purpose cleaner or dish soap mixed with warm water to clean acrylic surfaces. Avoid using harsh chemicals, as they can scratch or damage the surface.
Once you’ve chosen your cleaner, apply it generously to the shower floor, making sure to cover the entire surface, including the grout lines and any tough stains. Let the cleaning solution sit for 5 to 10 minutes to allow it to break down soap scum, grime, and mineral deposits.
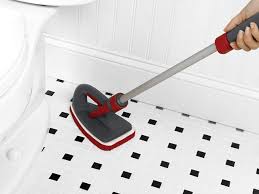
After allowing the cleaning solution to sit, it’s time to scrub the floor. Take your scrub brush and scrub the floor in small, circular motions. Focus on areas where grime tends to build up, such as the grout lines, corners, and around the drain. Be sure to scrub the grout lines thoroughly, as soap scum and mildew can easily accumulate in these areas. For tough stains, you can apply a little more cleaner and scrub again.
When scrubbing, avoid using excessive force, especially if you have delicate surfaces like acrylic or stone. Gentle pressure combined with the right cleaner will do the job without damaging the floor. If necessary, use a toothbrush or smaller brush to get into tight corners and grout lines.
Once you’ve finished scrubbing, it’s time to rinse the floor. Use a handheld showerhead or a bucket of clean water to rinse away the cleaning solution and all the grime you’ve scrubbed off. Be sure to rinse thoroughly, as leftover cleaner can leave residue behind, which can attract more dirt and make the floor slippery. Make sure all the cleaning solution is washed away before moving on to the next step.
The final step in cleaning your shower floor is drying it. Use a squeegee to remove excess water from the floor. Start at the top of the shower and pull the squeegee downward in long, smooth strokes. This will help remove most of the water, preventing water spots and streaks. After using the squeegee, use towels or a microfiber cloth to wipe down the floor and absorb any remaining moisture.
Drying the floor is crucial because excess water can lead to mold and mildew growth, especially in corners and along grout lines. Drying the surface as thoroughly as possible will also keep your shower looking fresh and clean.
To keep your shower floor in top condition, regular maintenance is key. Cleaning the floor once a week or every two weeks will prevent soap scum, grime, and mold buildup. After each shower, use a squeegee to remove excess water from the floor and reduce the chance of water spots forming. A quick wipe down with a damp cloth every few days will also help keep the floor looking fresh.
For areas with heavy buildup, such as grout lines, a monthly deep clean using a stronger cleaning solution may be necessary. By sticking to a regular cleaning schedule, you’ll ensure your shower floor stays clean and safe for the long term.
Regular cleaning of your shower floor offers several important benefits:
Health and Safety: Cleaning your shower floor regularly helps prevent the growth of harmful bacteria, mold, and mildew, which can lead to health issues such as respiratory problems and skin irritation.
Improved Hygiene: Soap scum, grime, and other residues can easily accumulate on your shower floor. Regular cleaning removes these elements, ensuring a hygienic and pleasant environment.
Aesthetic Appeal: A clean shower floor enhances the overall appearance of your bathroom, making it look more inviting and well-maintained.
Extended Lifespan: Regular cleaning helps preserve the quality of your shower floor, preventing damage caused by soap scum and mold buildup. This can extend the life of your shower floor and prevent costly repairs or replacements.
Increased Home Value: A clean, well-maintained bathroom can increase the value of your home. Buyers often look for well-kept bathrooms, and a clean shower floor can be an appealing feature.
To highlight the financial benefits of cleaning your shower floor, let’s compare the cost of regular cleaning with the cost of neglecting it. Here’s a simple breakdown:
| Home Maintenance Task | Average Cost | Cost of Neglect |
| Shower Floor Cleaning | $10 – $30 (DIY) | $500 – $6,000 (Mold Removal) |
| Kitchen Remodeling | $20,000 – $50,000 | N/A |
| Lawn Care | $150 – $500/year | N/A |
As you can see, regularly cleaning your shower floor is a cost-effective way to maintain your home. Ignoring regular maintenance can lead to expensive mold removal costs, which can run anywhere from $500 to $6,000 depending on the severity of the issue. On the other hand, maintaining a clean shower floor can be done for a minimal cost.
Cleaning the floor of your shower is essential for maintaining a clean and healthy bathroom. It prevents mold, mildew, and bacteria buildup, improving both the appearance and hygiene of your space. Regular cleaning also saves you money by reducing the need for costly repairs or mold removal services.
Follow this easy guide to keep your shower floor fresh, whether you have tile, stone, or acrylic. A quick daily squeegee and weekly deep cleaning will keep it in top condition for years to come.
Investing just a little time each week will make your bathroom healthier, safer, and more attractive. Let LeadCont help you with expert cleaning tips—register for a free quote today!
Ever find yourself staring at your computer screen a good consulting slogan to come to mind? Oftentimes.